"Edit Sort Order" - You can set how your records will be sorted. We are going to change the sort of this query to sort on Member number, so we can easily locate the highest member number.
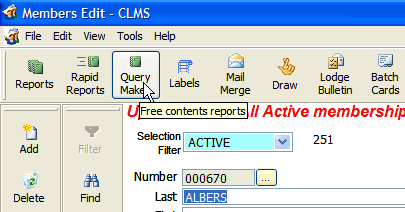
Run Query Maker, by clicking on the "Query Maker" button on the toolbar.
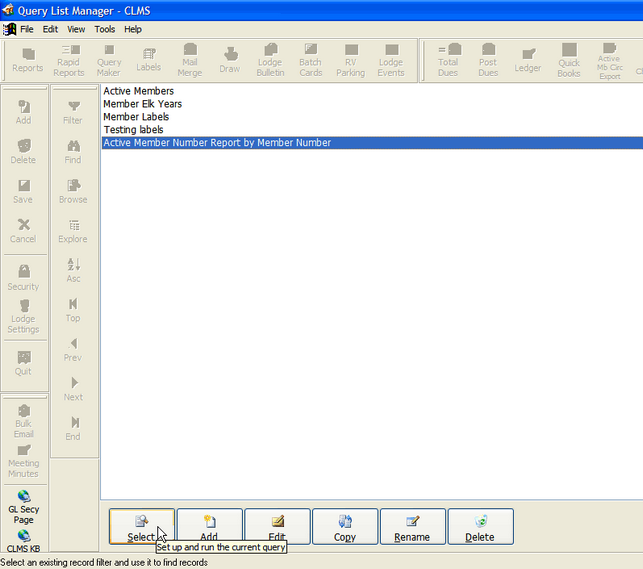
In this example we are going to modify the query called "Active Member Number Report by Member Number". See Copying A Query and Customizing for example of how this query was created. Click the "Select" button on the bottom toolbar.
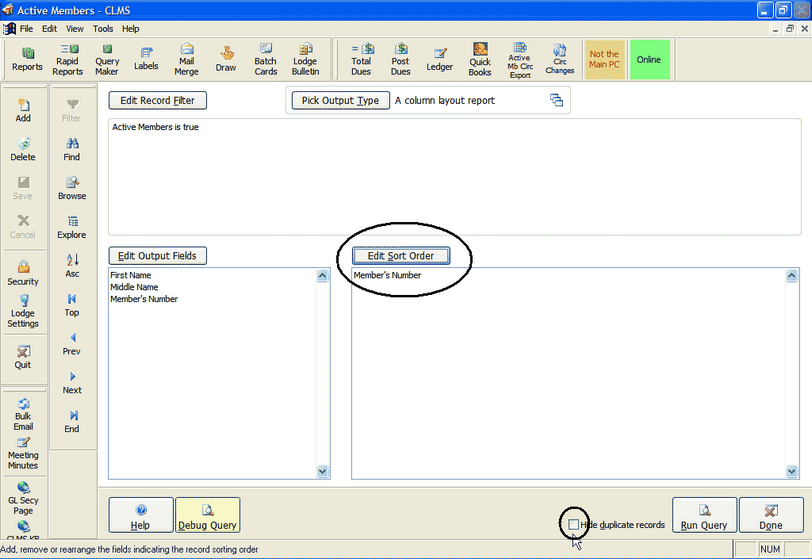
From the buttons provided on this page click on the "Edit Sort Order", button. We want the list to show up in member number order so that it will be easy to determine the highest membership number or even to scan for any gaps in member number sequence. 
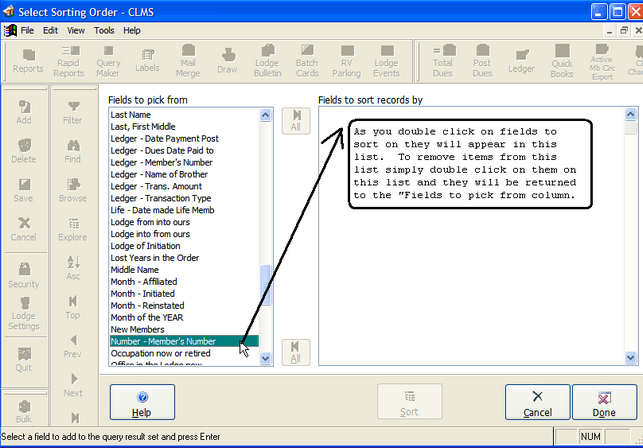
In the "Fields to pick from" column located on the left side of the form. Find the "Number - Member's Number" field and double click it. Double left clicking on fields in the "Fields to pick from" list will add these fields to list located on the right, "Fields to sort records by". This field will now appear in the "Fields to sort records by" column. Once you have completed adding all the fields you wish to sort on click the "Done" button. Records will sort data in the priority fields are listed in the "Fields to sort records by" list.
Note that the sort order will appear in a list below the "Edit Sort Order", button. To verify your sort you can run the query. With the option "Hide duplicate records" checked to eliminate any duplicates click the "Run Query" button to view report output options.
There is also a new button called "Debug Query" you may use this if you are having problems with your query or getting unexpected results.
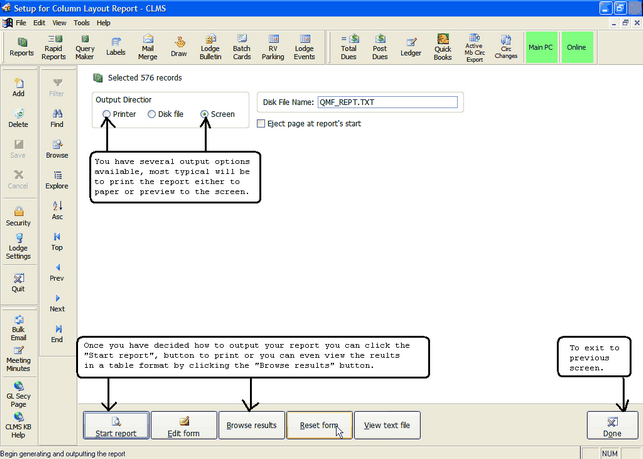
You will presented with several output options. You can choose to print or preview the report on the screen or choose the text file option. Once you have selected the type of output you want click the "Start report" button or the "Done" button when your ready to exit this screen.
Keep in mind that if you wish to create a text file for output you must already have the output type selected, otherwise you will get the default text output type. Review this link Pick Output Type to see more out other output types.
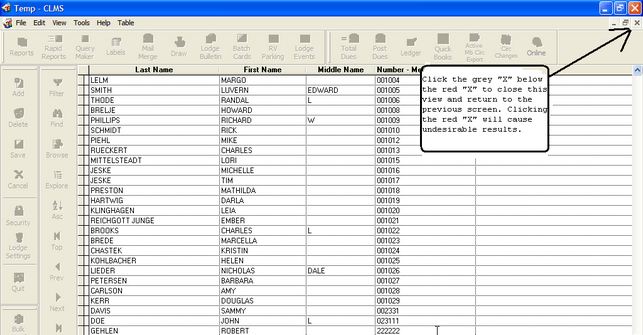
To view just the data you can click the "The results will be displayed in in a columned spreadsheet like format, if you notice the last column you can see that the list is sorted by member number lowest to highest. You can click the grey "X" as demonstrated below to exit you will then be presented with some output options. Make sure you don't select the red "X" to exit this screen you will get an error message and CLMS may freeze up.
Output Options
There are several output options you can choose from such as wether to preview the report on the screen or print it. Once you have selected the type of output you want click the "Start report" button to view or print the report or select the "Done" button when your ready to exit this screen. If you are wanting to create one of the Disk file options you must have it already configured see Pick Output Type for instructions before selecting the "Disk file" option.

See Also
Reference
Pick Output Type - How to change output types from various forms of text files spreadsheets and printed formats
Edit Record Filter - How to select the fields and their values for a particular query
Edit Output Fields - Selecting what fields to include in your output
Edit Sort Order - How output is to be sorted
Copying A Query and Customizing - An example of how to copy and customize a query.
Query Extraction Fields - See a list of fields and descriptions that can be added to your queries and reports
![]()
Suggestions or bug reports about the CLMS product or help can be emailed to CLMS Helpdesk.
© B.P.O. Elks of U.S.A. All rights reserved.
Page url: http://www.YOURSERVER.com/index.html?querymaker_change_sort.htm